How to Level Up Fast in Animal Simulator
Coin routes first, Safe Zone boss lures second, dummy farms when you need safe AFK progress.
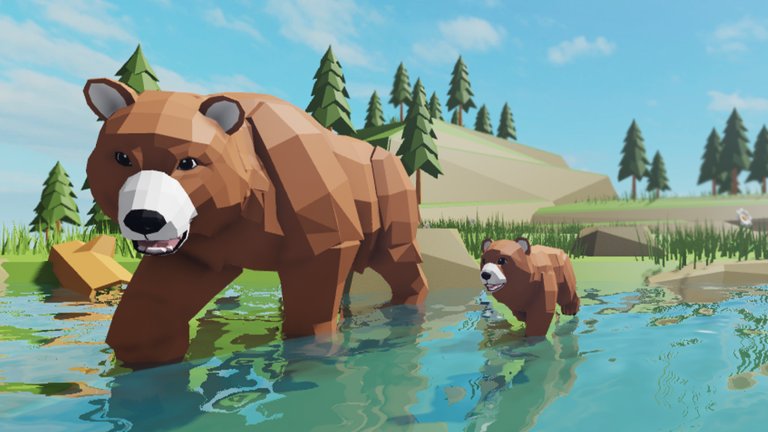
Leveling in Animal Simulator is a routing problem more than a button-mash problem. Damage scales at about 2× level and health at about 20× level, so every level multiplies how hard you hit and how long you survive. This guide explains the experience formula, why coins dominate active play, how Training Area dummies compare to PvP, when to lure bosses into the Safe Zone, and how flight and shop multipliers fit without turning the page into a pay-to-win pitch.
If you are brand new, skim Getting Started first, then come back here for pure XP efficiency.
Experience formula and what it implies
Community and game text describe per-hit experience as approximately [(1000 × exp multiplier) + player_level]. Two consequences matter for routing:
- Your base hit value grows slowly with level, so raw hit count alone is a weak plan.
- Multipliers amplify every hit, including dummy hits and boss hits, which makes consistent uptime more valuable than chasing slightly stronger targets.
Map coins have historically granted on the order of 200,000 EXP each. That single number explains why veterans abandon endless low-value PvP skirmishes: a clean coin loop can outpace dozens of random hits. Treat coins as your primary active currency of progress until your level is high enough that specialized training spots or boss loops clearly win.
Coin routes: the default active grind
Build a loop that starts at the barn Safe Zone, sweeps dense coin clusters, and returns before you overextend. Prioritize:
- Coins on short paths near spawn while you learn landmarks.
- Longer desert, forest, or floating-island sweeps once you can fly.
- Resetting through the Safe Zone whenever a high-level predator or boss path intersects your route.
Flying animals are the biggest non-shop upgrade for coin farming. Flight skips rough terrain, reduces ground ambushes, and lets you chain distant spawns before they despawn or get taken. Eagle forms are especially popular for egg hunts and travel; once you can fly, redesign your coin loop around air paths instead of roads.
Stay disciplined: do not abandon a full coin bag mid-route to chase a random duel unless the target is clearly weaker and on your path. Deaths reset momentum more than they teach combat.
Training Area hay dummies
The Training Area next to the Safe Zone is filled with hay dummies that grant the same hit EXP formula as PvP. Use dummies when:
- The server is stacked with high-level hunters.
- You want semi-AFK progress while watching a video or chatting.
- You are practicing attack cadence before a boss lure.
Dummies will not match a perfect coin route for active play, but they beat dying repeatedly in open PvP. Some players rotate: focused coin sweeps for twenty minutes, then dummy downtime while they plan the next loop. There are also quieter training spots away from the main lobby that veterans use when the barn is crowdedscout waterfalls and barn interiors once you know the main map.
PvP hits: when they are worth it
PvP uses the same per-hit formula, so theoretically any target works. In practice, only fight when:
- The opponent is near your level or weaker.
- You can disengage into the Safe Zone instantly.
- You are already near a coin route and the fight does not strand you.
Farming much stronger animals for “practice” usually costs more time than it returns. If you enjoy PvP, treat it as a secondary loop after coins and boss lures, not as your only plan.
Bosses to the Safe Zone
World bosses such as Lava Gorilla, Griffin, Rocky crab, and Bear are excellent XP and skin sources when handled correctly. The reliable method is to aggro the boss and walk it to the Safe Zone fence, then stand inside the barn area where bosses deal no damage while you keep attacking.
Why this works for leveling:
- You convert a dangerous open-world fight into a controlled DPS check.
- Pack members can stack damage safely once the boss is parked.
- Rewards and skins stack with the XP you earn during the fight.
Do not start boss farming before you can fly or at least sprint back to the fence. Learn one boss path thoroughly擫ava Gorilla and Griffin are common first targets攖hen expand. Full location and reward notes are on the bosses page. Animal picks that survive pulls better are discussed on the tier list.
Multipliers and gamepasses (careful notes)
Animal Simulator sells experience multiplier products such as 8× EXP and 13× EXP (prices and availability change over time on the Roblox storefront). Multipliers generally do not stack with each other in the way new players hope攂uying multiple EXP passes usually means you use one effective rate, not a multiplied product of all of them. Cosmetic gamepass skins (Lightning Tigers, Kitsune, Fire Hyena, and similar packs) mainly change appearance and sometimes grant a small speed bonus; they are not automatic level skips.
If you spend Robux, prioritize a single EXP multiplier you understand over random skin packs when your only goal is leveling. If you never spend, you can still climb efficiently with coins, flight, dummies, and Safe Zone boss lures. Never assume a script or third-party tool is required; legitimate routing is enough, and anything that violates Roblox rules risks your account. Community script indexes exist elsewhere on this wiki under scripts for readers who already understand the risks攖his leveling guide does not recommend breaking the rules.
Flying for route density
Flight changes XP math because time between coins drops. After you unlock a flyer:
- Redraw your coin loop as a sky circuit with Safe Zone landings.
- Chain eagle egg pickups into the same flights when convenient.
- Use height to spot bosses before they spot you, then decide whether to lure or skip.
Ground-only animals remain fine for early Safe Zone training, but delaying flight is the most common self-inflicted slowdown after ignoring coins.
Suggested progression by stage
Levels 1?0: Dummy warm-ups, short coin loops, unlock flight, join a pack near level 30.
Mid levels: Longer flying coin routes, first Safe Zone boss lures with pack help, hatch eggs at the Chicken NPC between runs.
High levels: Optimize contested coin timing, farm preferred bosses for skins and burst XP, use dummies only for true AFK gaps.
Common mistakes that waste hours
- Ignoring coins because PvP “feels” more active.
- Fighting outside the Safe Zone against animals dozens of levels above you.
- Buying every skin gamepass expecting faster XP.
- Skipping flight because a ground animal looks cooler.
- Starting Dinosaur Castle egg hunts before you can navigate and reset quickly攆inish basic coin competence first, then see eggs and skins.
Next steps
Bookmark this page, run one clean coin loop after every login, and schedule one boss lure per session once you can retreat reliably. Cross-check animal strength on the tier list, deepen boss tactics on bosses, and return to Getting Started if spawn or Safe Zone habits still feel fuzzy. Consistent routing beats frantic play every time.
Frequently Asked Questions
Quick answers to the most common questions.
What is the fastest way to level in Animal Simulator?
Active coin routes usually win for mid progression because coins have historically been worth about 200,000 EXP each. Add flying animals, then Safe Zone boss lures, and use hay dummies for safe downtime.
Do Training Area dummies give real EXP?
Yes. Hay dummies use the same per-hit experience formula as PvP hits, which makes them ideal when the open map is too dangerous or you want semi-AFK progress.
Should I buy 8× or 13× EXP gamepasses?
They speed hit-based gains if you already route well, but multipliers typically do not stack the way players hope. Coins, flight, and Safe Zone bosses still matter with or without a pass.
Why lure bosses to the Safe Zone?
Inside the barn Safe Zone, bosses deal no damage while you can keep attacking. That turns risky open fights into controlled XP and skin farms, especially with a pack.
When should I unlock flying animals?
As soon as possible. Flight shortens coin loops, enables eagle egg routes, and helps you spot or skip dangerous bosses while traveling.