Getting Started in Animal Simulator
Spawn at the barn, pick a tanky animal, farm coins, and unlock flying before your first real fights.
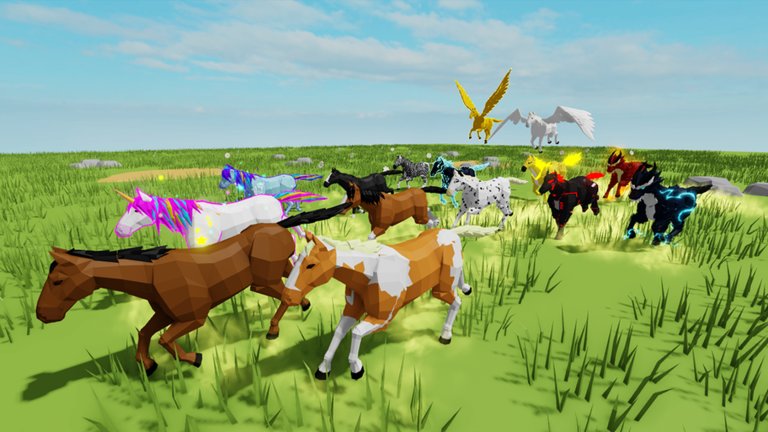
Animal Simulator is a free Roblox animal roleplay and PvP experience by ragnar9878 (place 5712833750, released 2020-09-20). You pick an animal, level it through combat and map collectibles, unlock skins from eggs, and eventually join packs for group play. This guide covers your first session end to end so you waste less time on weak starters and dead-end routes.
If you only remember three rules: stay near the Safe Zone until you understand combat, prioritize map coins over random PvP, and unlock a flying animal as soon as you can. Everything else in this walkthrough supports those habits.
Spawn, barn, and the Safe Zone
You spawn near the barn. The fenced barn area is the Safe Zone: player-versus-player damage is disabled there, and world bosses deal no damage while you stand inside it. Use the Safe Zone as your reset point after every coin run, egg hunt, or boss lure. Leave it only when you have a clear goal.
Inside or beside the Safe Zone you will find the Training Area hay dummies. Hitting a dummy grants the same experience formula as landing a hit in PvP, which makes early leveling safer when the server is full of high-level predators. Treat dummies as your default grind until coin routes click.
Learn the heart-shaped flower tunnel in front of the barn. Many community guides use that landmark as the origin for egg and coin directions. Orient yourself once, then leave the tunnel memorized so later maps make sense.
Pick your first animal wisely
Early damage scales at roughly 2× your level, and health at roughly 20× your level. That means a tanky body that can survive a few mistakes beats a glass-cannon skin you cannot keep alive. Strong early choices players recommend include lion, tiger, bear, and rhino. They forgive bad positioning while you learn controls and map geometry.
Do not obsess over rare cosmetics on day one. Skins from eggs and gamepasses look great, but raw level and a flying mount decide how fast you grow. Switch animals when you unlock something that flies or that clearly out-tanks your starter; your progress is tied to play, not to one permanent form.
Core controls in the first ten minutes
On PC the essentials are Q to attack, Shift to toggle run and walk, R to sit, T to rest, and G to fly on animals that support flight. Mobile players use on-screen buttons clustered on the right side of the screen for the same actions. Sit and rest help you pause without leaving the server; fly is the travel skill that turns the huge map into a manageable loop.
Practice attack timing on hay dummies before you chase players. Confirm that your health and damage bars update as you expect, then try a short loop outside the fence and retreat if someone much higher level tags you. A full key and button reference lives on the controls guide.
Experience, coins, and why routes beat random fights
Each successful hit awards experience using approximately [(1000 × exp multiplier) + player_level]. Multipliers come from account or shop boosts; they do not replace good routing. Historically, map coins have been worth on the order of 200,000 EXP each, which is why veterans treat coin loops as the primary active grind for mid levels.
Plan a short route that starts at the barn, sweeps nearby coin spawns, and returns to the Safe Zone when health dips or a boss path crosses yours. Flying animals compress that loop dramatically: you skip terrain, ignore many ground ambushes, and reach distant coin clusters before other players. When you are ready for denser XP tactics, open the level up fast guide.
Training dummies remain useful for AFK-friendly sessions or when the map is contested. Alternate: coin route while focused, dummy farm when you need safe passive progress. Avoid dying repeatedly in open PvP just to “practice”攄eaths cost time you could spend on coins.
Eggs, the Chicken NPC, and early skins
Eggs unlock animal skins. Collect eggs from the open map and from themed areas such as Dinosaur Castle, then bring them to the Chicken NPC near spawn to hatch. Eagle eggs (about eight across the map) generally require a flying eagle and landmarks measured from the barn or the heart flower tunnel. Dinosaur Castle hides seven eggs; the seventh typically needs a horse-and-cart fence clip that the community still uses as the intended workaround.
You do not need every egg on day one. Grab obvious map eggs when your route already passes them, hatch at the Chicken NPC, then schedule a dedicated castle run later. Deep egg routes and skin systems are covered in eggs and skins and the dedicated dinosaur eggs walkthrough.
First fights and boss awareness
When you leave the Safe Zone for combat, pick soft targets near your level or stick to dummies. High-level animals melt low-level health quickly because damage scales with level. If a fight goes badly, retreat through the fence擯vP stops at the boundary.
World bosses such as Lava Gorilla, Griffin, Rocky crab, and Bear drop strong rewards and skins when beaten, but they also hit hard in the open. A common strategy is to lure a boss toward the Safe Zone, stand inside the fence, and attack while the boss deals no damage to you. Learn one boss path before you farm packs of them. Details and reward notes live in the bosses guide.
Packs at level 30
Around level 30 you can join packs. Packs make boss pulls, coin escort, and social play easier, and they reduce how often you get isolated by stronger loners. Join a pack when you have basic flight and a reliable coin route; then use group voice or chat to call Safe Zone resets and egg hunts.
Pack play does not replace personal routing. Keep farming coins and hatching eggs on your own schedule so you are not stuck waiting for teammates to log on.
Codes, tier lists, and community pages
Check the codes page when the developer re-enables redemption攈istorically codes have been disabled at times, so treat listed codes as time-sensitive. For animal strength comparisons and skin priorities, browse the tier list. For pack leaders, notable players, and social context, see players.
First-session checklist
- Spawn at the barn and walk the Safe Zone fence so you know the boundary.
- Pick a tanky starter (lion, tiger, bear, or rhino) and learn Q / Shift / R / T / G.
- Hit Training Area dummies until attack timing feels natural.
- Run a short coin loop and return to the Safe Zone before health bottoms out.
- Unlock or borrow a flying animal as soon as possible for travel and eagle eggs.
- Hatch any eggs you find at the Chicken NPC near spawn.
- Attempt one Safe Zone boss lure only after you can reliably retreat.
- At level 30, join a pack and bookmark this wiki for level up, eggs, and bosses deep dives.
Follow that order and your first hour in Animal Simulator builds real power instead of random deaths. Revisit this page after major updates if spawn layout or egg quests shift, then jump into the linked guides for the systems that match your next goal.
Frequently Asked Questions
Quick answers to the most common questions.
Where is the Safe Zone in Animal Simulator?
The Safe Zone is the fenced barn and spawn area. PvP is disabled there, and bosses deal no damage while you stand inside it. Use it as your reset after coin runs and boss lures.
What should I do first as a new player?
Learn controls on hay dummies, pick a tanky animal like lion, tiger, bear, or rhino, farm nearby map coins, then unlock a flying animal for travel and eagle eggs.
How does experience work per hit?
Each hit awards roughly [(1000 × exp multiplier) + player_level] EXP. Map coins have historically been worth about 200,000 EXP each, so coin routes usually beat random early PvP.
When can I join a pack?
Packs unlock around level 30. Join after you have basic flight and a coin route so you contribute in boss pulls and egg hunts instead of relying entirely on teammates.
Where do I hatch eggs?
Take collected eggs to the Chicken NPC near spawn. Map eggs, eagle eggs, and Dinosaur Castle eggs all feed into skins through that hatch flow.